Achieve Velvety Smooth Fresh Strawberry Ice Cream at Home
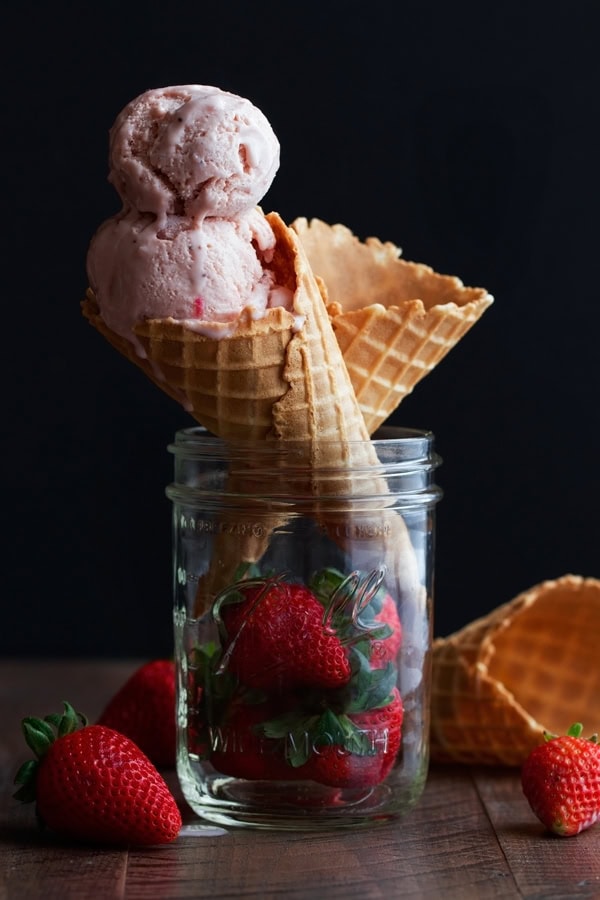
There's something truly magical about homemade ice cream, and when that ice cream is infused with the vibrant taste of ripe strawberries, it becomes an unparalleled summer delight. Forget the artificial flavors and mediocre textures of store-bought varieties; crafting your own
fresh strawberry ice cream at home promises a creamy, luscious experience that captures the very essence of the season. This isn't just a dessert; it's a celebration of nature's bounty, a nostalgic journey, and a testament to the simple joy of creating something extraordinary from scratch. Prepare to unlock the secrets to a truly velvety smooth creation that will have everyone asking for more.
The Irresistible Charm of Homemade Fresh Strawberry Ice Cream
Why go through the effort of making ice cream when you can simply pick it up from the freezer aisle? The answer lies in the profound difference in quality and flavor. Homemade
fresh strawberry ice cream offers an unmatched depth of taste, a natural sweetness, and a beautiful, authentic pink hue that no artificial additive can replicate. You control every ingredient, ensuring a purer, healthier version free from unwanted preservatives or corn syrups.
The process itself is incredibly rewarding. From selecting the brightest berries to seeing the custard transform into a rich, creamy base, each step builds anticipation. Unlike mass-produced versions, your homemade creation boasts a luxuriously smooth texture, devoid of ice crystals, and a balanced flavor profile that highlights the natural tang and sweetness of fresh strawberries. It’s a dessert that feels both gourmet and heartwarming, a testament to simple, fresh ingredients creating something truly extraordinary. For more on the pure joy, explore
The Joy of Homemade Fresh Strawberry Ice Cream: A Summer Classic.
Unlocking Peak Flavor: Selecting and Preparing the Perfect Strawberries
The secret to truly outstanding
fresh strawberry ice cream begins with the strawberries themselves. Timing is everything. Aim to prepare this ice cream at the peak of strawberry season, typically from April to June, when these ruby-red jewels are at their absolute best. During this window, berries boast an intensely sweet aroma and a robust, juicy flavor that will shine through in your finished ice cream.
When selecting strawberries, look for those that are:
*
Bright Red: A deep, uniform red color indicates ripeness. Avoid berries with white or green shoulders.
*
Fragrant: Ripe strawberries should have a strong, sweet scent. If you can't smell them, they likely won't taste as good.
*
Firm but Not Hard: They should yield slightly to gentle pressure.
*
Free from Blemishes: Avoid bruised, moldy, or mushy berries.
For an extra layer of gourmet flavor, if you happen upon the delicate wild strawberries known as *fraises des bois*, seize the opportunity! Their concentrated, floral sweetness is unparalleled and will elevate your ice cream to an artisanal level.
Once you have your perfect berries, proper preparation is key. Gently wash about 2 cups of fresh strawberries under cool running water, then hull them (remove the green leafy tops and the small core). Slice them thinly – this helps them integrate beautifully into the custard and release their juices. While some recipes call for pureeing the strawberries, slicing them allows for small, delightful bursts of fresh fruit flavor in every spoonful, adding both texture and visual appeal.
Crafting the Velvety Custard Base: A Step-by-Step Guide
The foundation of any truly creamy ice cream lies in its custard base, often referred to as a *crème anglaise*. This rich, egg yolk-thickened mixture is what gives homemade ice cream its signature smoothness and prevents the formation of large ice crystals.
Here's a detailed breakdown of the ingredients and steps:
**Ingredients You'll Need:**
* 3 cups half-and-half (the perfect balance of richness and lightness)
* 6 large egg yolks
* 1 cup granulated sugar
* Pinch of salt
* 2 cups sliced fresh strawberries
* 1 tsp. pure vanilla extract
**Directions for the Custard:**
1.
Gently Warm the Half-and-Half: In a medium saucepan, gently warm the 3 cups of half-and-half over medium heat. Stir occasionally to prevent scorching. You're looking for steam to begin rising from the surface, indicating it's hot but not boiling, typically 4 to 5 minutes. Remove from heat immediately once steaming begins.
2.
Prepare the Egg Yolk Mixture: In a separate heatproof bowl, whisk together the 6 egg yolks, 1 cup sugar, and pinch of salt until the mixture is pale yellow and well blended. It should be thick and ribbony.
3.
Temper the Yolks: This is a crucial step to prevent the egg yolks from scrambling. While whisking the egg yolk mixture constantly, gradually pour about a third of the hot half-and-half into the bowl. Continue whisking vigorously until fully incorporated. This slowly raises the temperature of the egg yolks. Then, pour the tempered egg yolk mixture back into the saucepan with the remaining warm half-and-half, whisking constantly.
4.
Cook the Custard: Return the saucepan to medium-low heat. Cook, stirring constantly with a wooden spoon or heatproof spatula, for 8 to 10 minutes. The key here is patience and constant motion. Do *not* allow the custard to boil, as this will scramble the eggs and ruin the texture. The custard is ready when it is thick enough to coat the back of the spoon, and when you draw your finger across the coated spoon, it leaves a clear trail.
5.
Strain and Infuse: Immediately pour the cooked custard through a fine-mesh sieve set over a clean bowl. This step is essential for a supremely smooth texture, catching any tiny bits of cooked egg that might have formed. Stir in the sliced strawberries and vanilla extract. Adding the vanilla after cooking preserves its delicate aroma and flavor.
6.
Rapid Cooling: To stop the cooking process and ensure food safety, nestle the bowl containing the custard into a larger bowl filled halfway with ice and water (an ice bath). Stir occasionally until the custard cools to room temperature. This rapid cooling is important for developing the best texture.
7.
Thorough Chilling: Cover the bowl tightly with plastic wrap, ensuring the wrap touches the surface of the custard to prevent a skin from forming. Refrigerate the custard until it is thoroughly cold, at least 1 hour, but ideally 4-6 hours or even overnight. A well-chilled custard churns more efficiently, resulting in smaller ice crystals and an incredibly smooth, creamy finished product. For a deeper dive into making perfect homemade ice cream, consider
Homemade Fresh Strawberry Ice Cream: Peak Season Perfection.
The Churning and Freezing Process: Achieving Velvety Perfection
Once your custard is perfectly chilled, you're ready for the exciting part: transforming it into glorious ice cream!
1.
Churning in the Ice Cream Maker: Transfer the cold custard mixture to your ice cream maker. Follow your manufacturer's instructions for churning. Most machines will churn for 20-30 minutes, or until the mixture reaches the consistency of soft-serve ice cream. During this process, the ice cream maker incorporates air, which contributes to the light, smooth texture, and simultaneously breaks up ice crystals as they form.
* *Tip:* Ensure your ice cream maker's bowl (if it's a freezer-bowl type) is fully frozen beforehand – usually 12-24 hours in the freezer.
2.
Freezing for Firmness (Ripening): Once churned, the ice cream will be soft. Carefully transfer it to a clean, freezer-safe container. Press a piece of plastic wrap directly onto the surface of the ice cream to prevent freezer burn and the formation of ice crystals on top. Then, secure the lid.
* Place the container in the coldest part of your freezer. Freeze for at least 3 hours, or up to 3 days, until the ice cream is firm enough to scoop. This final freezing period, often called "ripening," allows the flavors to meld further and the texture to fully set.
When it's time to serve, allow the ice cream to sit at room temperature for a few minutes to soften slightly, making it easier to scoop and revealing its ultimate creamy texture.
Expert Tips for Your Best Fresh Strawberry Ice Cream
To truly master the art of homemade
fresh strawberry ice cream and guarantee that velvety smooth finish, keep these expert tips in mind:
*
Embrace Strawberry Season: As mentioned, the quality of your strawberries directly impacts the final flavor. Don't skimp on good, ripe berries.
*
Don't Rush the Chill: A well-chilled custard is the secret weapon against icy ice cream. The colder the base, the smaller the ice crystals during churning, leading to that coveted smooth texture.
*
Preventing Ice Crystals: Beyond chilling, ensure your ice cream is stored in an airtight container with plastic wrap pressed directly on the surface. Air exposure is the enemy of creamy ice cream in the freezer.
*
Consider a Touch of Acidity: While not in the original recipe, a tiny squeeze of fresh lemon juice or a pinch of lemon zest can brighten the strawberry flavor without making the ice cream sour. Add it along with the vanilla.
*
Serving Temperature: For the best texture and flavor experience, let your homemade ice cream sit out for 5-10 minutes before serving. This allows it to soften slightly, making it easier to scoop and enhancing its creamy mouthfeel.
*
Get Creative: While delicious on its own, this
fresh strawberry ice cream is also fantastic as part of a sundae, alongside a slice of pound cake, or as a delightful topping for a fruit crisp.
Conclusion
Creating your own
fresh strawberry ice cream at home is an incredibly rewarding culinary adventure. From the careful selection of sun-ripened berries to the meticulous crafting of the custard base and the final magical churn, each step contributes to a dessert that is far superior to anything you'll find in a store. The result is a luxuriously creamy, naturally sweet, and beautifully vibrant treat that truly captures the essence of summer in every velvety smooth spoonful. So, gather your ingredients, follow these steps, and prepare to delight your taste buds and impress your loved ones with this classic, homemade masterpiece. Your journey to perfect fresh strawberry ice cream starts now!